分类目录归档:SBC

Go RISCV AES性能提升1100%?使用KCAPI教程

效果

Go-KCAPI地址,https://github.com/mengzhuo/go-kcapi (欢迎各种PR)
AES-CBC benchmark如下:上面是使用KCAPI的,下面是Go标准库

goos: linux
goarch: riscv64
pkg: github.com/mengzhuo/go-kcapi/aes
cpu: Spacemit(R) X60
BenchmarkCBCEncrypto/size=65536             4128            277873 ns/op         235.85 MB/s         752 B/op           3 allocs/op
BenchmarkCBCStdEncrypto/size=65536           391           3064170 ns/op          21.39 MB/s           0 B/op           0 allocs/op

235 MB/s vs 21.39 MB/s

性能提升:1102%

示例代码

go-kcapi我做了一定的封装,跟Go标准库有类似的调用方法
Developer Friendly ™

package main

import (
        "fmt"
        "log"

        "github.com/mengzhuo/go-kcapi/aes"
)

func main() {
        key := []byte("--YOUR-AES-KEY--")
        iv := []byte( "--YOUR-AES--IV--")
        enc, err := aes.NewCBCEncrypter(key, iv)
        if err != nil {
                log.Fatal(err)
        }
        src := []byte("--Hello,世界--")
        dst := make([]byte, 16)
        enc.CryptBlocks(dst, src)
        fmt.Printf("%x", dst) // d57b7738a2d589e0a42ca7424f6d47ed
}

原理

SpacemiT K1 芯片提供了硬件加速功能,并通过Linux Kernel Crypto User Interface暴露了出来。
通过调用相应接口有这么大提升了。

开发念念碎

TLDR;

最近在研究SpacemiT的riscv64 K1芯片,发现这个SoC有个硬件的AES加速模块。
可惜不是用riscv k扩展(crytpo)开发的,而是通过Linux内核暴露出来的自有的引擎(crypto engine)
这能忍不了,Go程序不能榨干芯片性能心痒痒。

于是看看Go咋调用Linux Kernel Crypto Engine。一顿搜索发现竟然没有库……读了读文档,发现还挺简单啊,不就socket编程嘛,就自己写一个!(后来发现我错了,原来相当复杂)

第一难:没有合适的文档
不得不说,Linux的内核文档没有示例代码,基本上啥都要直接翻libkcapi的源码和内核自身的源码。特别是cmsghdr压根没有类型说明,啥都是宏定义……我还是从源码里才翻出来ASSOCLEN是uint32_t,搞得好像这个世界只有C语言用户和C binding了。

第二难:没法debug AF_IF
这个不是shash的问题,内核得开dbg的问题,sendmsg之后。没有合适的地方返回,都是EINVALID,dmesg里也没日志,只能自己strace看调用数据。

第三难:不懂splice,scatter/gather RW,sendfile....
这是我的错,没学习过类似知识,比如网上的例子都是splice的,但Go runtime大牛Andy Pan,提醒我可以直接用sendfile,那不是6字就能代表我的心情的。

第四难:Go crypto接口跟Linux crypto接口不匹配,啊,这就是这个库存在的意义啦,要不开发者自己去用unix包调用也是可以的,反正不就是那几个syscall和buffer构建嘛~

第五难:好像没啥用……man……人艰不拆,还有好几个alg没实现,看看有没有人用再折腾吧……

总之,能调用kcapi提升性能,又学到了不少新知识,那是相当高兴的。
回头再按知识点写个Go开发相关接口的博客吧。
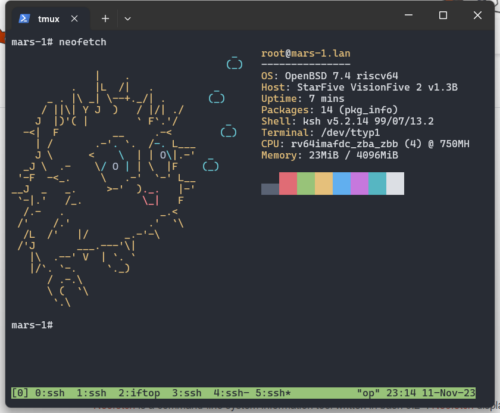
Installing OpenBSD 7.4 on a MilkV Mars

Here are some instructions for getting OpenBSD 74 running on a MilkV Mars (V1.11).

You will need:

  1. SD card at least 8GB
  2. An USB TTL serial adapter
  3. A second machine to interact with the MilkV Mars over serial
  4. An Ehternet cable and able connection to a tftp server

The original idea came from " Installing OpenBSD 7.3-current on a VisionFive2" , You can also check this instruction for references.

Steps

  1. Download miniroot.img 7.4 from OpenBSD.
  2. Donwload special DTB made by jh7110-starfive-visionfive-2-v1.3b.dtb and upload it to tftp server (my are 10.0.0.21)
  3. Flash this miniroot.img into SD card
  4. Boot the Mars and hit any key during U-Boot, now you can hit any keys during boot up
--------EEPROM INFO--------

In:    serial
Out:   serial
Err:   serial
Model: Milk-V Mars
Net:   eth0: ethernet@16030000, eth1: ethernet@16040000
switch to partitions #0, OK
mmc1 is current device
found device 1
bootmode flash device 1
** Invalid partition 3 **
Couldn't find partition mmc 1:3
Can't set block device
** Invalid partition 3 **
Couldn't find partition mmc 1:3
Can't set block device
Hit any key to stop autoboot:  0
StarFive #
  1. Uboot setup ip and load DTB file by
dhcp; setenv serverip 10.0.0.21; tftpboot ${fdt_addr_r} jh7110-starfive-visionfive-2-v1.3b.dtb

load mmc 1:1 ${kernel_addr_r} efi/boot/bootriscv64.efi; bootefi ${kernel_addr_r} ${fdt_addr_r}
  1. That's It! Now you can boot with OpenBSD and do install by normal process

OpenBSD 7.4 on MilkV Mars

p.s. In OpenBSD sysctl hw.perfpolicy=high to enable performance mode.