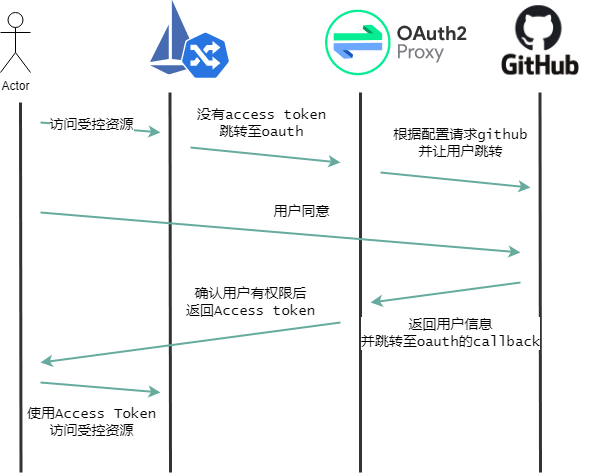
在AWS EKS用上了istio后,部署服务很方便,但是我发现不少应用没有自带账号验证机制(比如jaeger),而很多数据信息比较敏感,那怎么办呢?Keycloak又太复杂了,这就想到了Github账号机制来管理,那要是能整合到istio里就太好了~说干就干
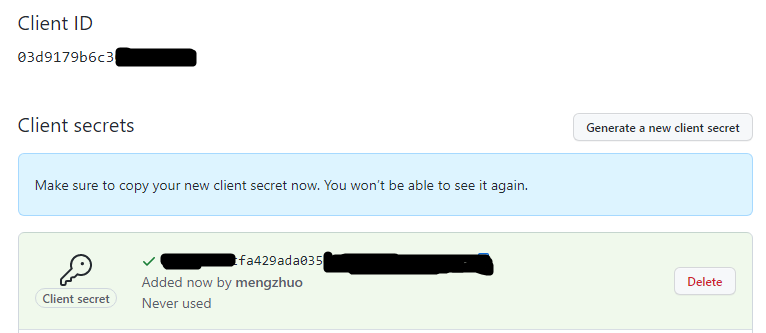
首先配置Github的应用App (官方文档),记好Client ID 和 Client secret,等回会用到。
配置好应用的oauth2 callback地址,比如 https://example.com/oauth2,等下istio需要配置对应的service。接着就是安装和配置oauth2-proxy(helm)
configuration:
  clientID: "xxxxx" #刚才的Github Client ID
  clientSecret: "xxxxxxxxxxxxxxxxx" # 刚才的Github Client Secret
  ## 用这个命令生成一段随机的secret
  ## openssl rand -base64 32 | head -c 32 | base64
  cookieSecret: "xxxxxxxxxxxxxxxxxxxxxxxx="
extraArgs:
  [
    "--provider=github", # provider 我们选github
    "--github-org=example", # 组织填入自己的组织名,还有其他验证范围可选,具体可以看文档
    "--scope=user:email", # 这个是oauth-proxy的bug……不加上会不停的重定向
    "--upstream=static://200", # 也是不加上就不停重定向的bug
    "--pass-authorization-header=true",
    "--pass-user-headers=true"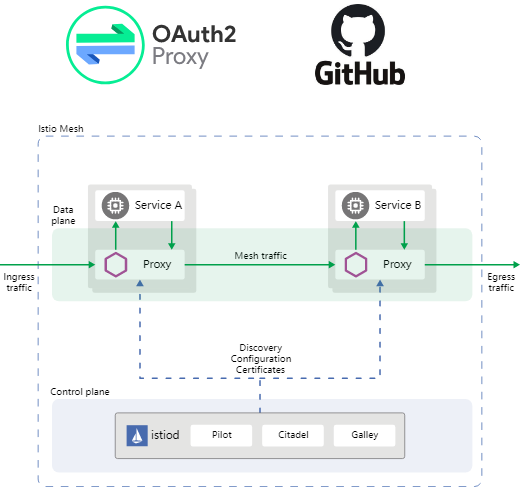
]github-org这个配置可以改成你需要的验证方式,具体可以看oauth2-proxy官方文档(链接)。回到我们的istio配置上,给整个istio添加自定义的extensionProvider,让Github 的 AuthorizationPolicy能跑通。有点懵了是吧,我画了张不太准确的图帮助理解
kubectl edit configmap -n istio-system istio 编辑istio的配置,最后大概长这样,注意里面的注释说明
apiVersion: v1
data:
  mesh: |-
    defaultConfig:
      discoveryAddress: istiod.istio-system.svc:11111
      proxyMetadata: {}
    enablePrometheusMerge: true
    rootNamespace: istio-system
    trustDomain: cluster.local
    # 上面的都是原来的配置,不要改,关键是下面这个
    extensionProviders:
    - name: "gh-example-oauth2" # 要记得这个名字,等会儿会用到
      envoyExtAuthzHttp:
        # 这里要指向你自己的oauth2-proxy安装的service,我这里是放在oauth2-proxy这个namespace下
        service: "gh-oauth2-proxy.oauth2-proxy.svc.cluster.local"
        port: "80" # 这个是helm安装的默认端口(kubeapp也是)
        includeRequestHeadersInCheck: ["authorization", "cookie"] # 这三个必须和我的一样
        headersToUpstreamOnAllow: ["authorization", "path", "X-Auth-Request-User", "X-Auth-Request-Email", "X-Auth-Request-Access-Token"]
        headersToDownstreamOnDeny: ["content-type", "set-cookie"]
然后再配置istion的virtual service,让服务整个跑起来,同样注意我里面的注释,官方的文档写得太文绉绉,喜欢的也可以去读一下(链接)
apiVersion: networking.istio.io/v1beta1
kind: VirtualService
metadata:
  name: example-vs
  namespace: example-ns #应用自己的namespace
spec:
  hosts:
  - "jaeger.example.com"
  gateways:
  - example-gw # 之前安装istio时的gateway
  http:
  - match: # 这里保持和github里的一致
    - uri:
        prefix: /oauth2
    route:
    - destination:
        host: gh-oauth2-proxy.oauth2-proxy.svc.cluster.local # oauth2的安装svc地址
        port:
          number: 80
  - match:
    - uri:
        prefix: /
    route:
    - destination:
        host: jaeger.app.svc.cluster.local # jaeger的svc地址
        port:
          number: 8080
---
apiVersion: security.istio.io/v1beta1
kind: AuthorizationPolicy
metadata:
  name: jaeger-github-oauth2
  namespace: example-ns
spec:
  selector:
    matchLabels:
      app.kubernetes.io/component: query #重要!不要填错了,匹配不上不会生效的
      app.kubernetes.io/name: jaeger
  action: CUSTOM
  provider:
    name: "gh-example-oauth2" # 跟istio配置里的extensionProviders保持一致
  rules:
  - to:
    - operation:
        # 注意是精确匹配的!!要加通配符才能前缀匹配
        paths: [ "/*"]
kubectl apply之后,重启istio,访问你的应用,看到这个就成功啦~

参考: https://medium.com/@lucario/istio-external-oidc-authentication-with-oauth2-proxy-5de7cd00ef04